Easily check if your server or device is reachable with simple ICMP ping monitoring.
Quick to set up and effective for uptime checks.
Step 1
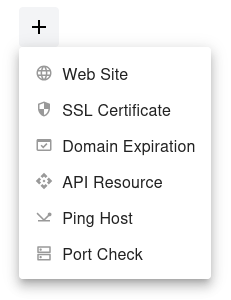
Open the dashboard, click the  button, and select Ping Host from the dropdown menu.
Step 2
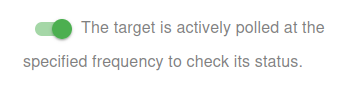
Choose whether to activate the monitor immediately or keep it paused for now:
- Active: The target is actively polled at the specified frequency to check its status.
- Paused: The target is temporarily inactive and will not be polled until set to active again.
Step 3
Set the Name and the Domain or IP (IPv4/IPv6) for your target. The Name will appear in alerts, reports, and notifications.


You have now set the minimum required settings to start monitoring your resource/target.
The next steps are optional.
If you click Save, our bots are ready to start scanning and monitoring your site
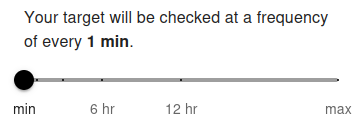
Scan Frequency (Up/Down Monitoring)
Your target will be pinged at a frequency of every 5 min by default. The minimum allowed frequency is 1 minute and the maximum is 24 hours.
The ping frequency determines how often your server or device is checked for reachability using ICMP. Setting a shorter interval (e.g., 1 minute) allows you to detect outages almost instantly. For free users, the minimum frequency is typically 5 minutes, while premium users can set it to 1 minute for near real-time monitoring. Frequent pings are recommended for critical servers and network devices to ensure fast alerting.
Longer intervals (e.g., 1 hour or more) are suitable for less critical devices where immediate notification is not required. Choose the frequency based on how quickly you need to respond to downtime and the importance of the monitored system.
Advanced Settings
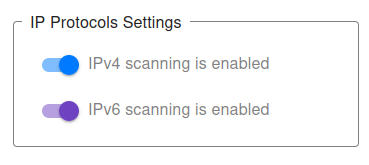
IP Protocols Settings
You can choose which IP protocols to use when monitoring your target. By default, both IPv4 and IPv6 are allowed, and the monitoring bot will decide automatically which protocol to use.
-
IPv4 only – All ping checks will be sent using IPv4.
Example:
1.2.3.4(IPv4 address) will only allow IPv4 pings. -
IPv6 only – All ping checks will be sent using IPv6.
Example:
[2001:db8::1](IPv6 address) will only allow IPv6 pings. - IPv4 + IPv6 (default) – Both protocols are supported, and monitoring will work for any valid domain.
👉 If you provide a direct IP address (e.g., 1.2.3.4 or [2001:db8::1]), the system automatically restricts monitoring to that protocol type (IPv4 or IPv6).
👉 For hostnames (e.g., example.com), you may explicitly choose to monitor only via IPv4 or only via IPv6.
This can be useful for:
- Testing whether your server is reachable via both protocols.
- Ensuring IPv6 readiness before migration or deployment.
- Debugging connectivity or firewall issues specific to one protocol.
For most cases, we recommend keeping the default (IPv4 + IPv6) setting, ensuring maximum compatibility and availability.
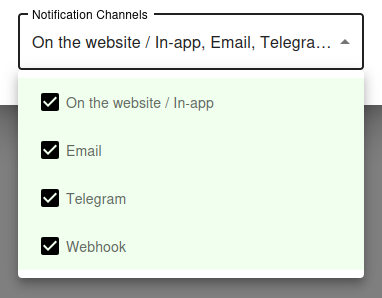
Notification Settings – Choose how you want to receive alerts
How would you like to be notified?
By default, all available notification channels are enabled:
- On the website / In-app
- Telegram
- Webhook
You can customize which channels to use for this monitor individually, or globally manage permissions for Email, Telegram, and Webhook notifications via your Notification Channels settings.
✅ Recommended: Keep all channels enabled for maximum awareness of uptime issues, but adjust according to your preferences and workflow.